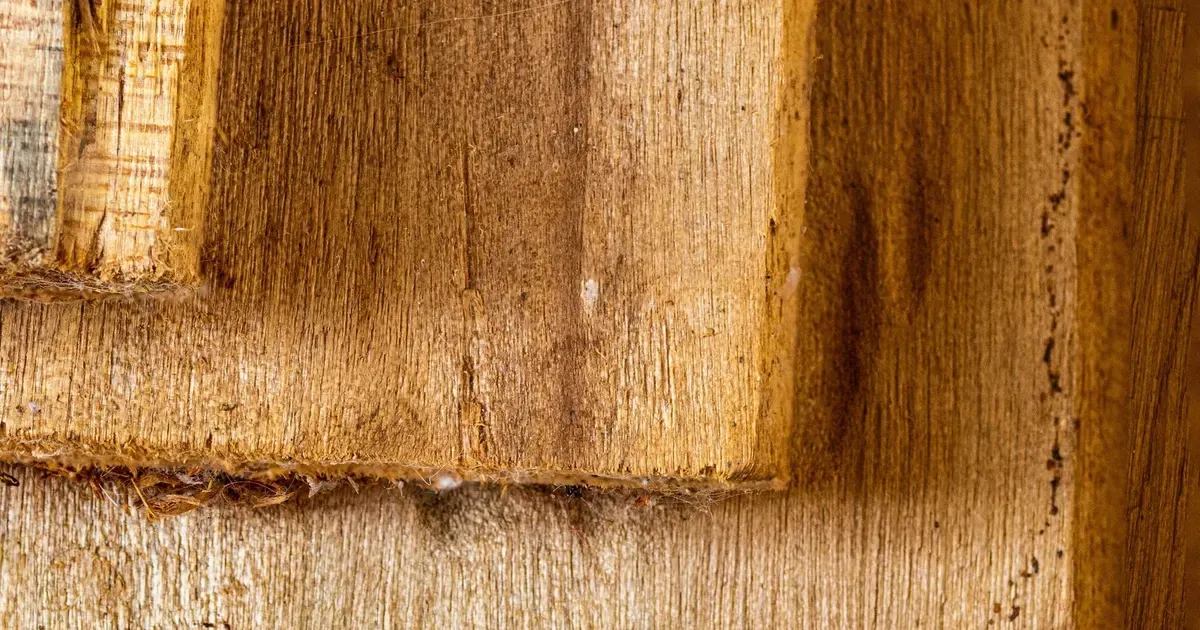
Most floors are sanded until the traces of the saw are gone. A saw mark floor does the opposite: it keeps those traces, or recreates them, and treats them as the texture. Designers ask for it when they want an architectural, timber-yard look that is more regular than hand scraping and rougher than wire brushing. This guide explains where saw marks come from, what the texture asks of an engineered board and how to describe it so the factory and the buyer picture the same surface.
Where saw marks come from
Every sawn surface carries the signature of the blade that cut it. What differs is the pattern.
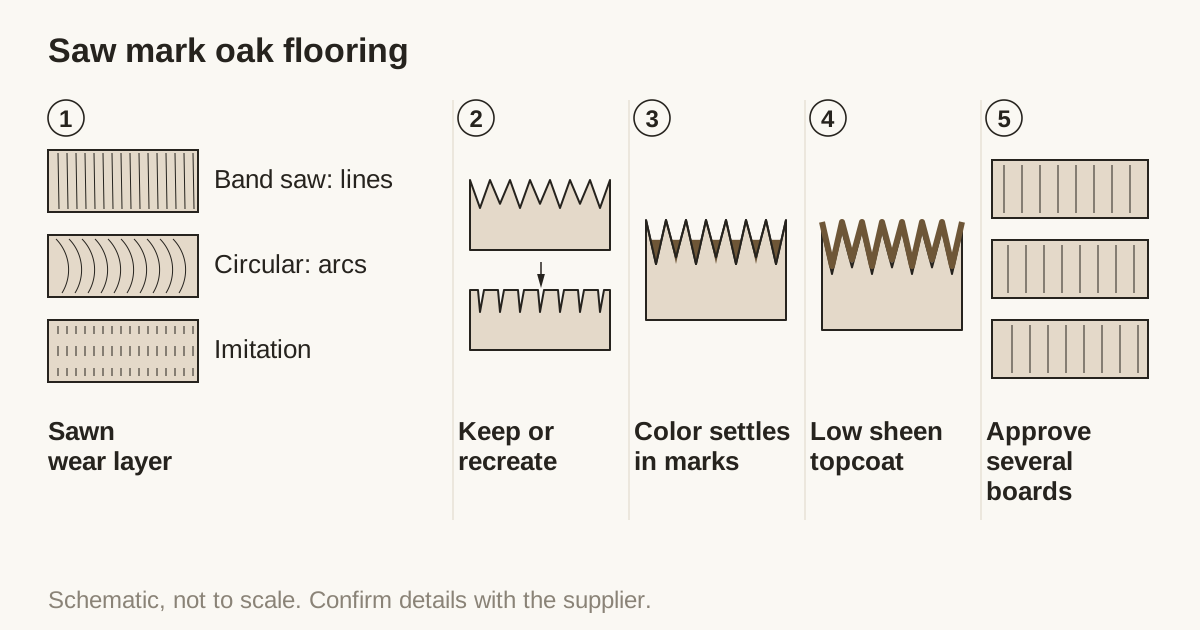
- Band saw marks. A band saw runs a continuous blade in one direction, so the marks are fine to coarse lines that run roughly straight across the width of the board. The spacing follows the feed speed and the blade.
- Circular saw marks. A circular blade cuts in an arc, so the marks curve. On a board face they read as overlapping crescents, sometimes called swirl marks.
- Imitation saw marks. A face that was sanded smooth can be given a pattern that imitates either of the above, using a cutter or an abrasive head. It is a look, not a record of the saw.
The engineered wear layer in a board like ours is itself a sawn layer, bonded to the core. That is a useful fact for this texture, because a sawn face already carries marks before sanding. The question is how many of them are kept.
Keeping the marks or recreating them
There are two routes to a saw mark floor, and they behave differently in production.
| Route | What happens | What it asks of the factory |
|---|---|---|
| Keep the original marks | The sawn face is left lightly sanded or only calibrated, so the saw lines remain | A consistent, well-set blade and a wear layer cut evenly across the board |
| Recreate the marks | The face is sanded flat first, then the pattern is cut in | An extra machining step and a tool that repeats cleanly |
Keeping the original marks gives a more natural result, but it depends on the quality of the cut. If the blade is dull or the feed is uneven, the marks vary in depth across a single board, and a face that looks lively in one place can look rough in another. Recreating the marks gives more control over depth and direction, at the cost of a pattern that can look regular over a large area.
What the texture asks of the wear layer
Marks have depth, and depth comes out of the wear layer. A pronounced saw mark can take a visible share of a thin layer in the low points. The wear layer options on our pages are 1/16” (2mm), 1/8” (3mm), 5/32” (4mm) and 1/4” (6mm) sawn, with other thicknesses made to order. The thicker the layer, the more room there is for texture and for a future sanding.
Two practical points follow.
- Consistency of thickness. The wear layer is cut to the thickness on the specification and checked across the board before pressing. An even layer means the texture depth is even.
- Refinishing. Sanding a saw mark floor removes the marks. Owners who want the texture back after a refinish need the surface recreated, which is a conversation for the project, not for the factory alone.
Our wear layer guide and the article on wear layer bonding and pressing cover how thickness and bonding relate to the finished board.
How color and finish behave
Stain and coating settle into saw marks the way they settle into any relief. The low points collect more color and read darker, and the high points read lighter. On a dark stain the lines appear as soft shading. On a light or clear finish they appear as fine texture.
- Sheen. Lower sheens keep attention on the grain and the lines. A glossy coat makes saw marks look like scratches. Matte, Extra Matte and Ultra Matte are the three sheens on our Specify page, and our guide to choosing floor sheen compares them.
- Color depth. Because color collects in the marks, the finished board looks deeper than the same stain on a smooth board. Always approve color on a board with the same texture as production.
- Cleaning. Fine dust sits in the marks. A regular dry clean keeps the surface looking even, especially in kitchens and entrances.
Edges, formats and cuts of oak
The texture sits best with some choices and awkwardly with others.
- Micro-bevel. A fine bevel outlines each board and sits naturally with a textured field. A square edge makes the floor continuous, which can look intentional with marks running across several boards. See square edge and micro-bevel.
- Plank. Saw marks read clearly on a plank format because the lines run across the width in one direction. On herringbone and chevron the lines change direction block by block, which is a deliberate effect that should be approved on a drawing and a sample.
- Cut of oak. Plain sawn faces show cathedral grain, while rift and quarter faces show straighter lines. Saw marks across a straight grain can look busy, and across a cathedral grain they can look softer. The article on rift and quarter against plain sawn explains the cuts.
- Grade. Premium and Select give a quiet face that lets the marks lead. Natural and Rustic add knots and color movement, which suits a rustic look and can compete with the saw lines.
What the Specify page offers
The texture options on our Specify page are Smooth, Light Wire Brushed, Medium Wire Brushed, Wire Brushed and Wire Brushed with Cross Marks. A saw mark texture is not one of the listed options. If a project calls for one, say so in the RFQ and send a reference board, and whether it can be made, and how consistent it can be across a lot, is confirmed at quotation and agreed on an approved sample. We do not state a result before we have seen the reference.
The closest listed choices are the two deeper wire brushed levels and Wire Brushed with Cross Marks, which is brushed and then cross-worked for a more irregular surface. If the saw mark idea is really about relief and rhythm rather than the saw itself, one of those may meet the brief. Our article on wire brushed against smooth oak shows how the listed textures behave.
Where a saw mark floor fits
Saw marks suit interiors that want a material, workshop character: lofts, cafes, showrooms and homes with exposed structure. They are a weaker fit for formal rooms where a calm, smooth plane is expected, and for projects where the floor will be sanded and refinished often.
Writing the specification
A saw mark request needs more words than most.
- Name the type: band saw marks, circular saw marks or an imitation of either.
- Say whether the original marks are kept or recreated.
- Describe direction and scale: lines across the width or arcs, fine or coarse.
- State the construction and the wear layer thickness, because depth comes from it.
- Give the sheen and finish system.
- Attach a physical reference board.
- Say how much variation is acceptable across the lot.
Approving the sample
Review several boards. A saw mark floor is judged by how the pattern repeats from board to board and by how it looks across a room, not by one board held in the hand. Look at the samples in daylight and in the light of the finished space, from standing height. Record the texture, direction, wear layer, sheen and color reference that you approved. That record becomes the master for production, in the way described in approving flooring color on a physical sample.
Questions to ask before you order
| Question | A clear answer covers |
|---|---|
| Original marks or recreated? | How the pattern is produced |
| What wear layer thickness? | Room for the depth of the texture |
| Which direction do the marks run? | Across width, or arcs, or changes by block |
| Which sheen and finish? | How the texture will read |
| Is the sample the same construction as production? | A sample that predicts the lot |
Working with Vu Uy Wood
Vu Uy Wood manufactures solid and engineered French White Oak flooring to buyer specification in Song Than 3 Industrial Park, Ho Chi Minh City, and has done so since 2006. The Specify page lists the texture, sheen and finish options and turns your selections into a written specification. For a saw mark surface, send the reference board together with the specification. We normally reply within one working day.